Facebook / Instagram
Before you begin, you must have atleast one Facebook page and a lead generation form. You can follow this guide to obtain an access token for your account.
Prerequisites
Before you begin, you must have atleast one Facebook page and a lead generation form. You can follow this guide to obtain an access token for your account.
Note: This feature is in beta, if you find any bugs, please report them to our team.
Adding a new Lead Sync Source
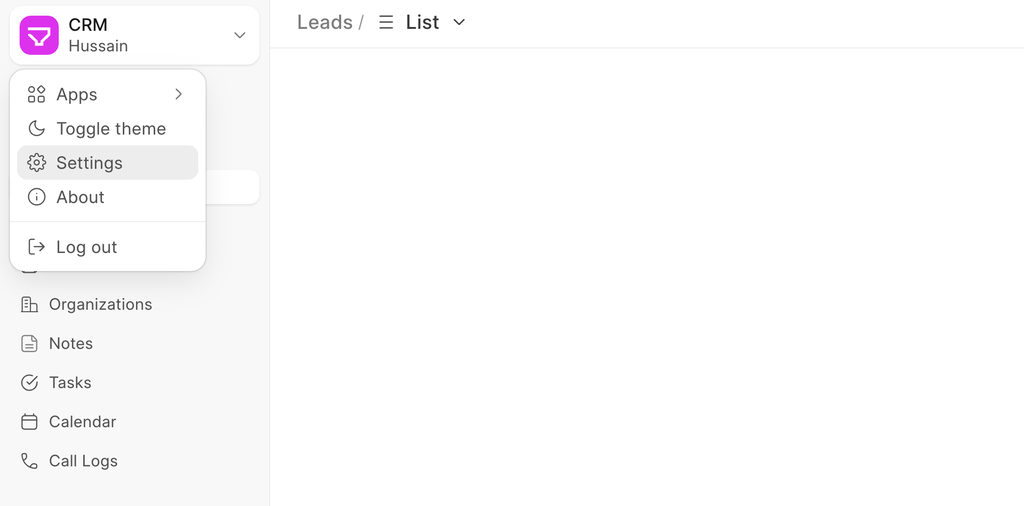
Open Settings from the dropdown menu on top-left corner of the CRM dashboard:
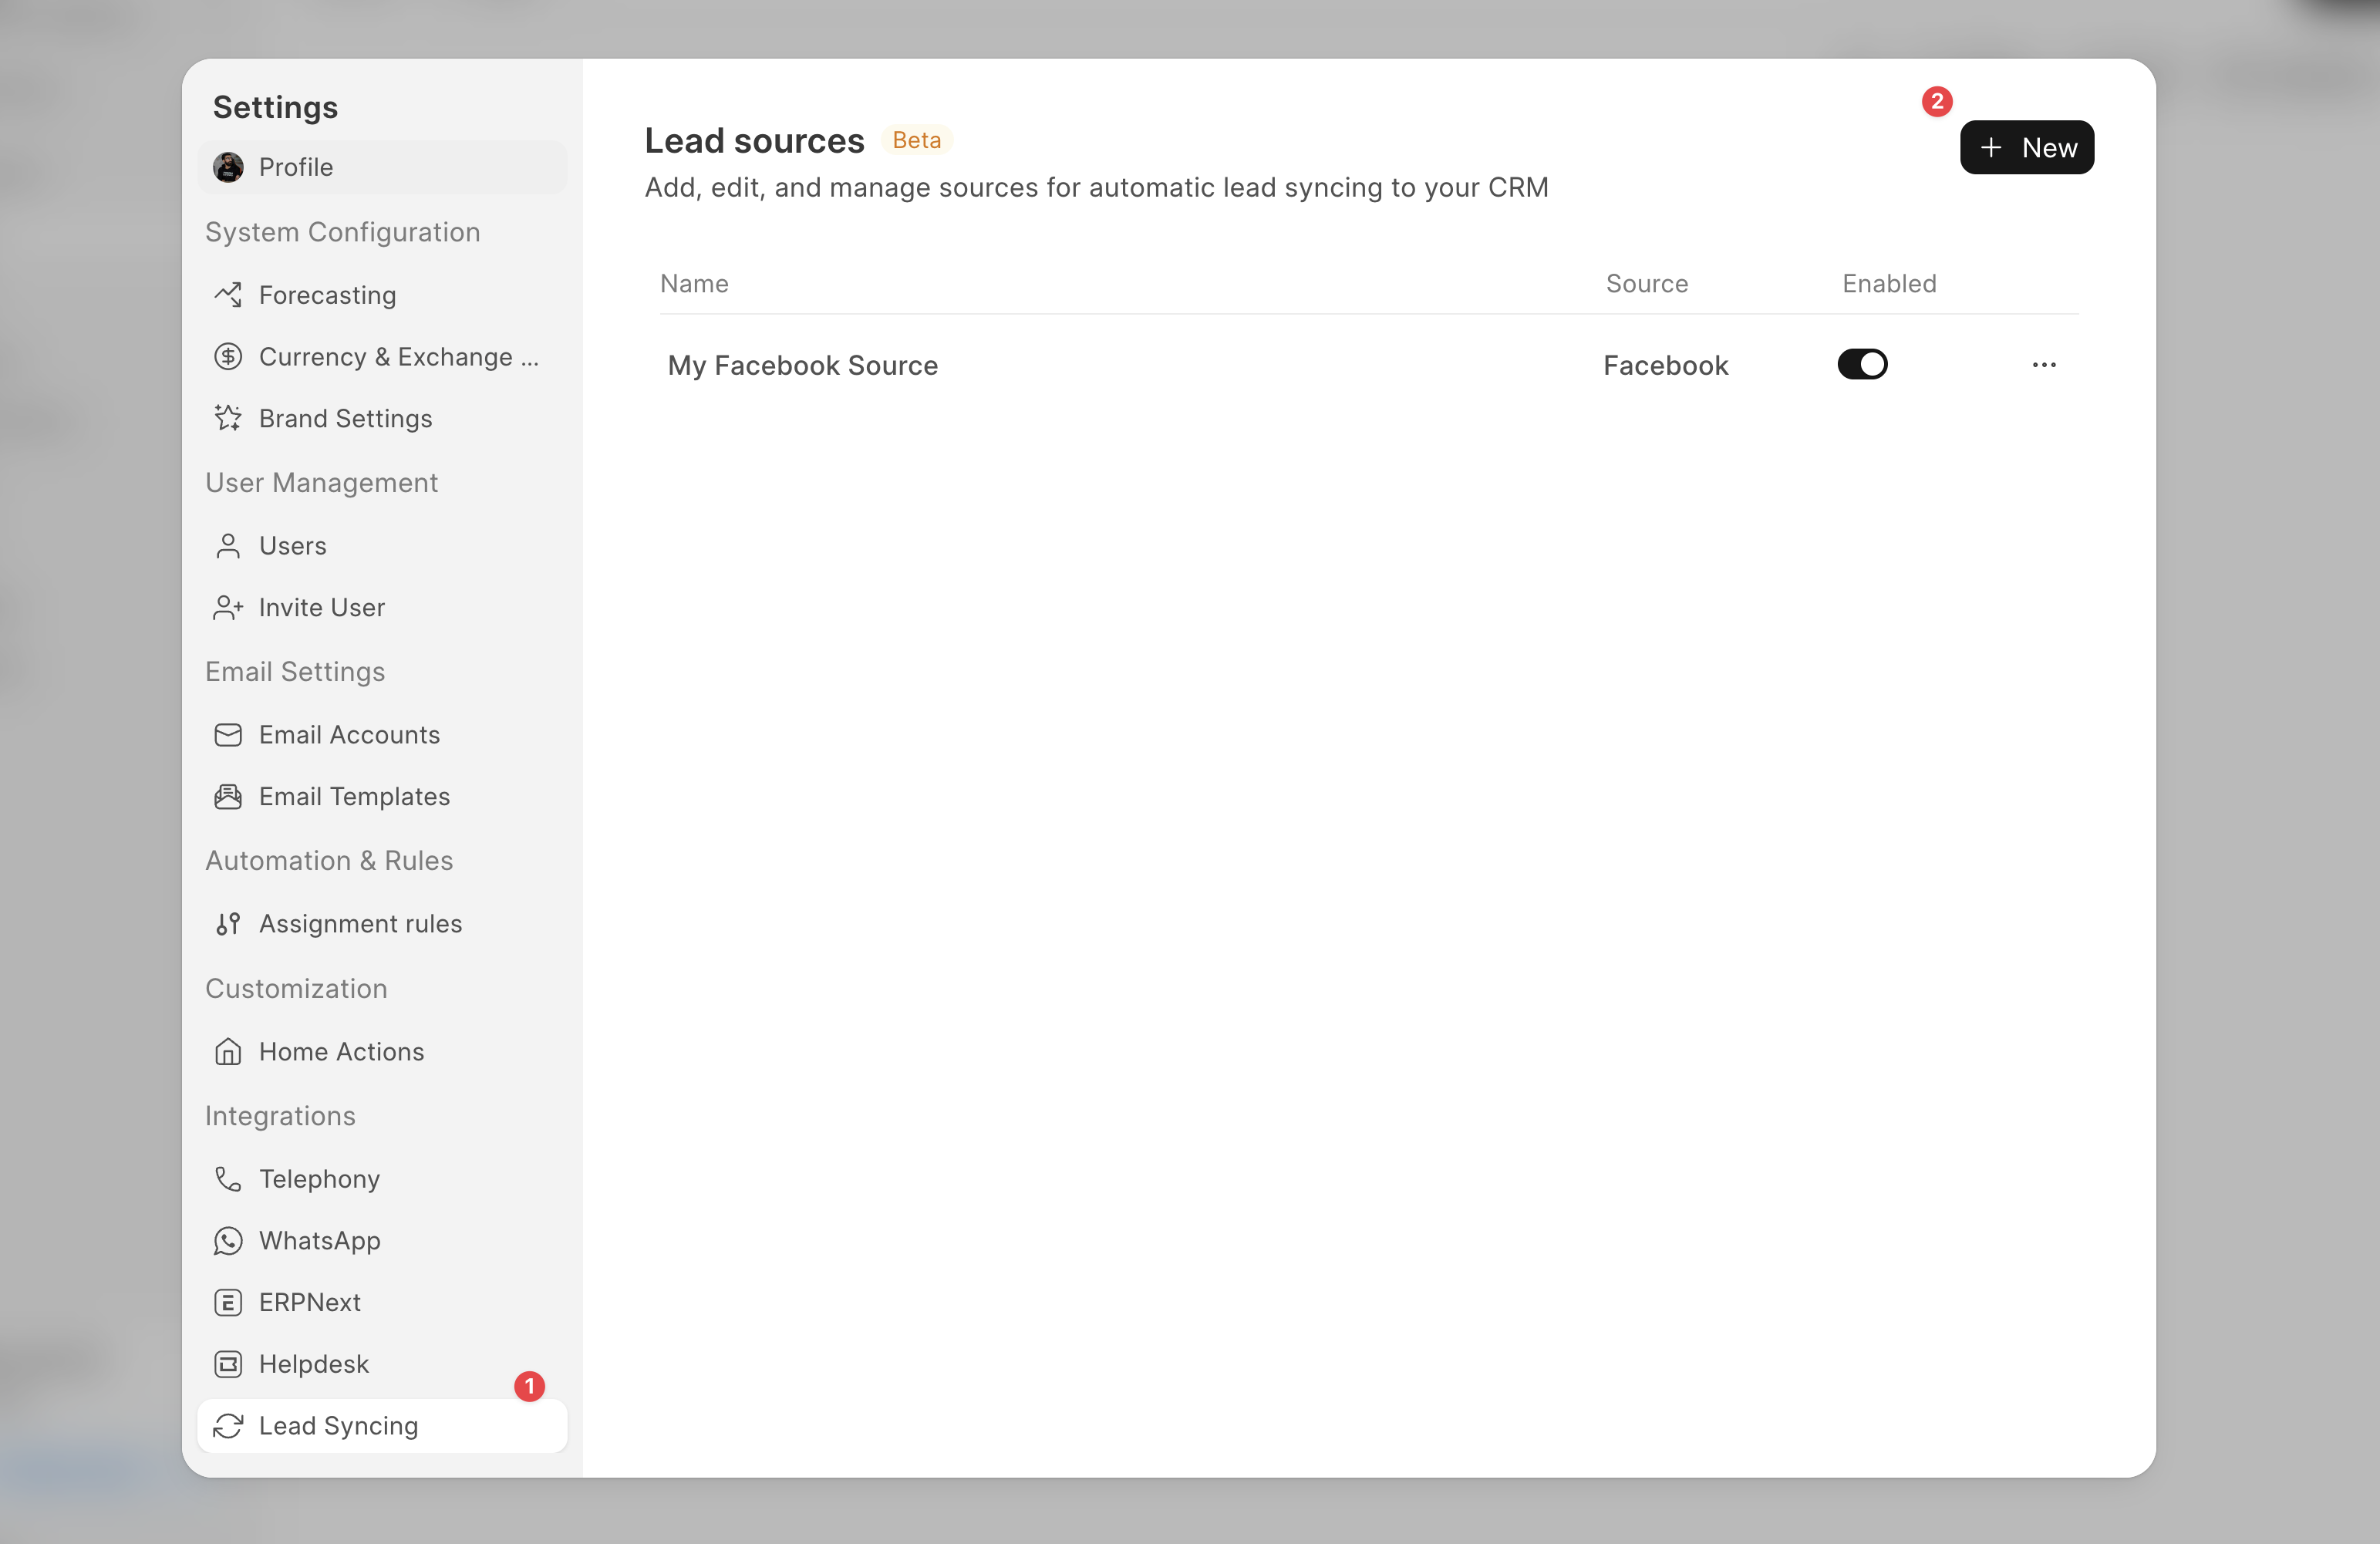
Click on the Lead Syncing tab and then click on the + New button to add a new Source:
Configuring Lead Sync Source
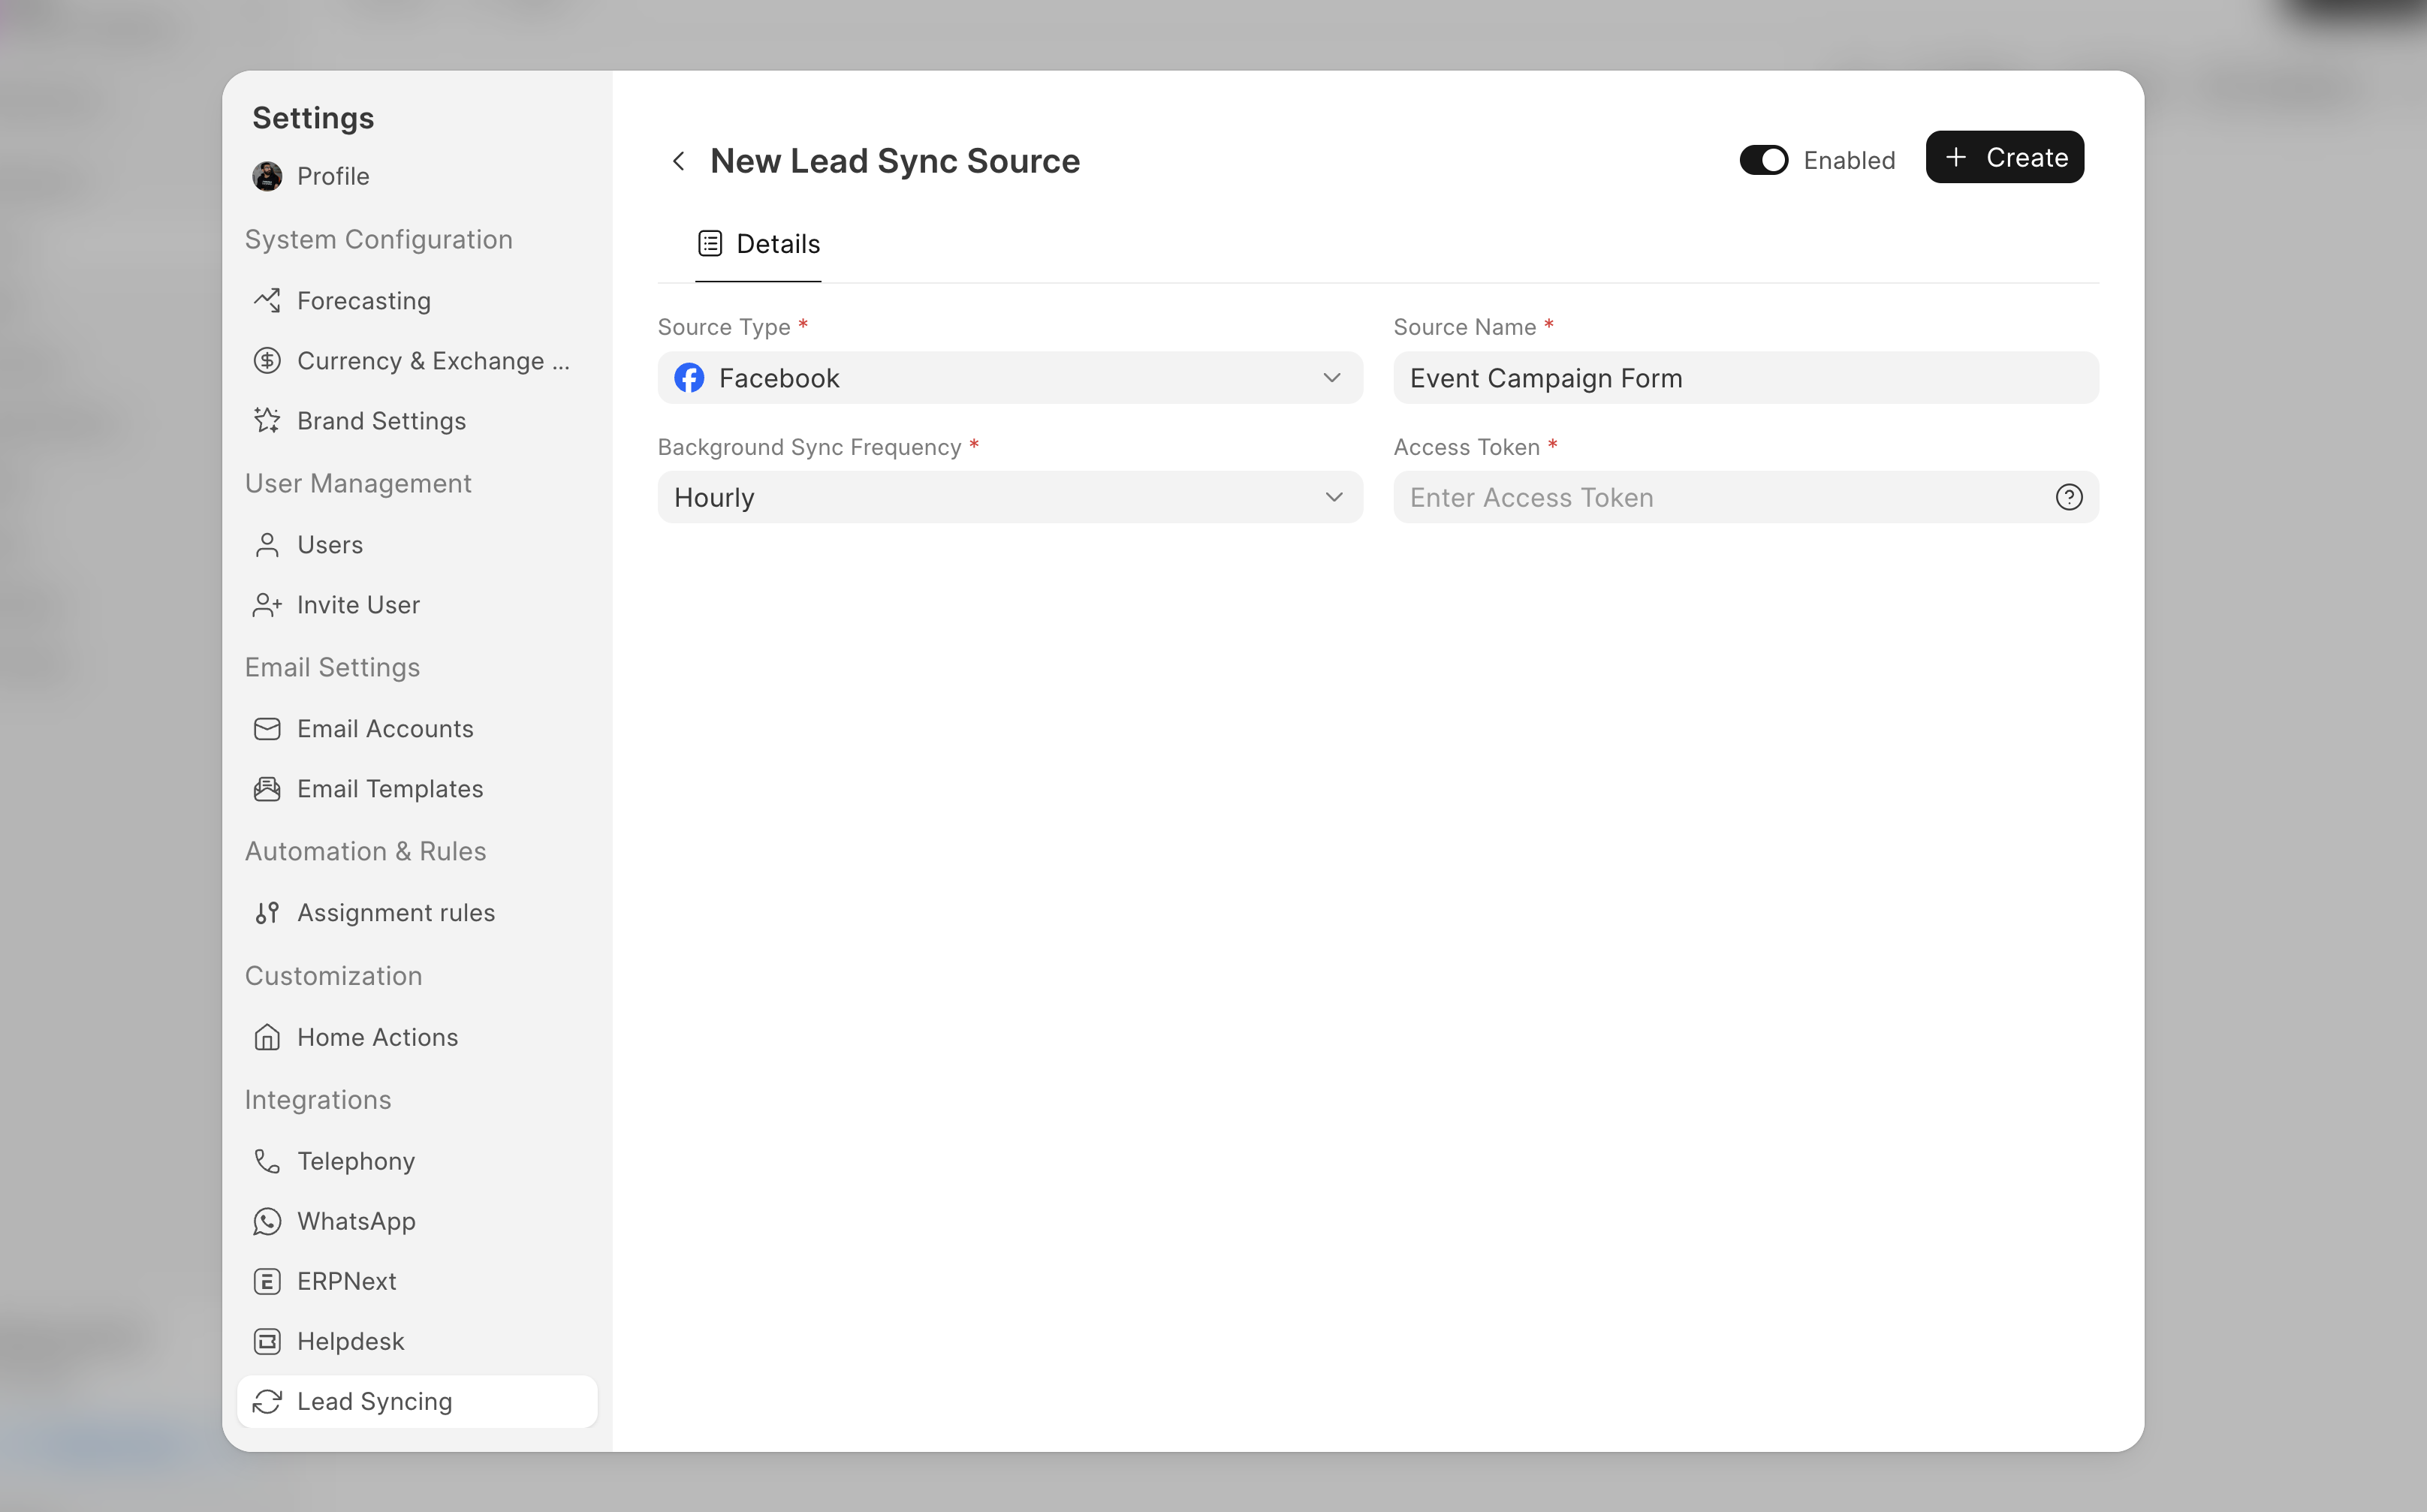
Now follow these steps:
- Select Facebook as the source type
- Give your source a relevant name
- Select a frequency for scheduled syncing: how frequently the leads should be automatically synced
- Paste the Access token obtained from Meta
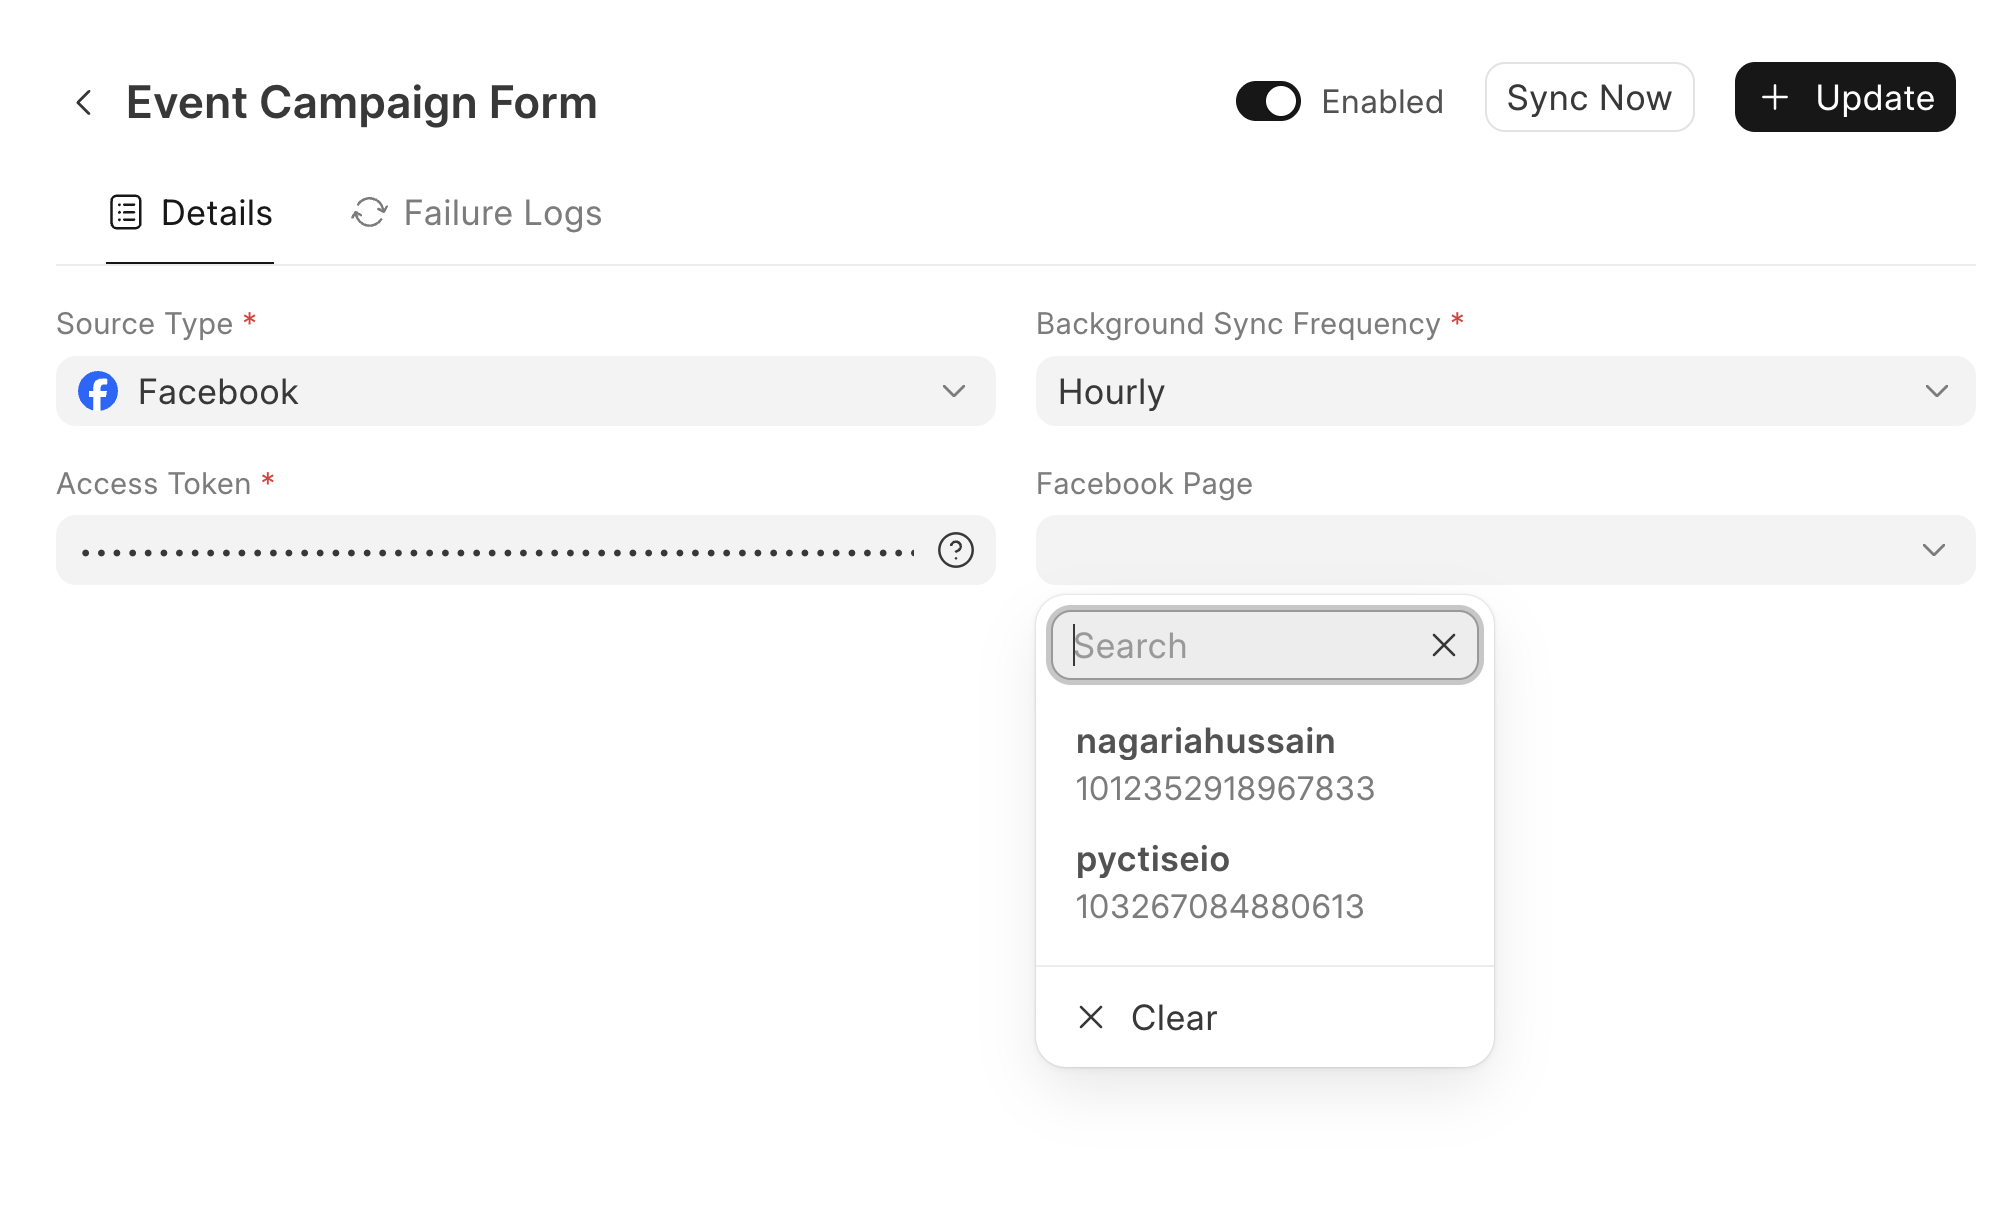
Now click Create. It will take a few seconds since we are pulling the pages and forms from Facebook. But once it is done, you can select the page and the form from where the leads will be pulled in from:
As soon as you select the form, you will see a mapping table:
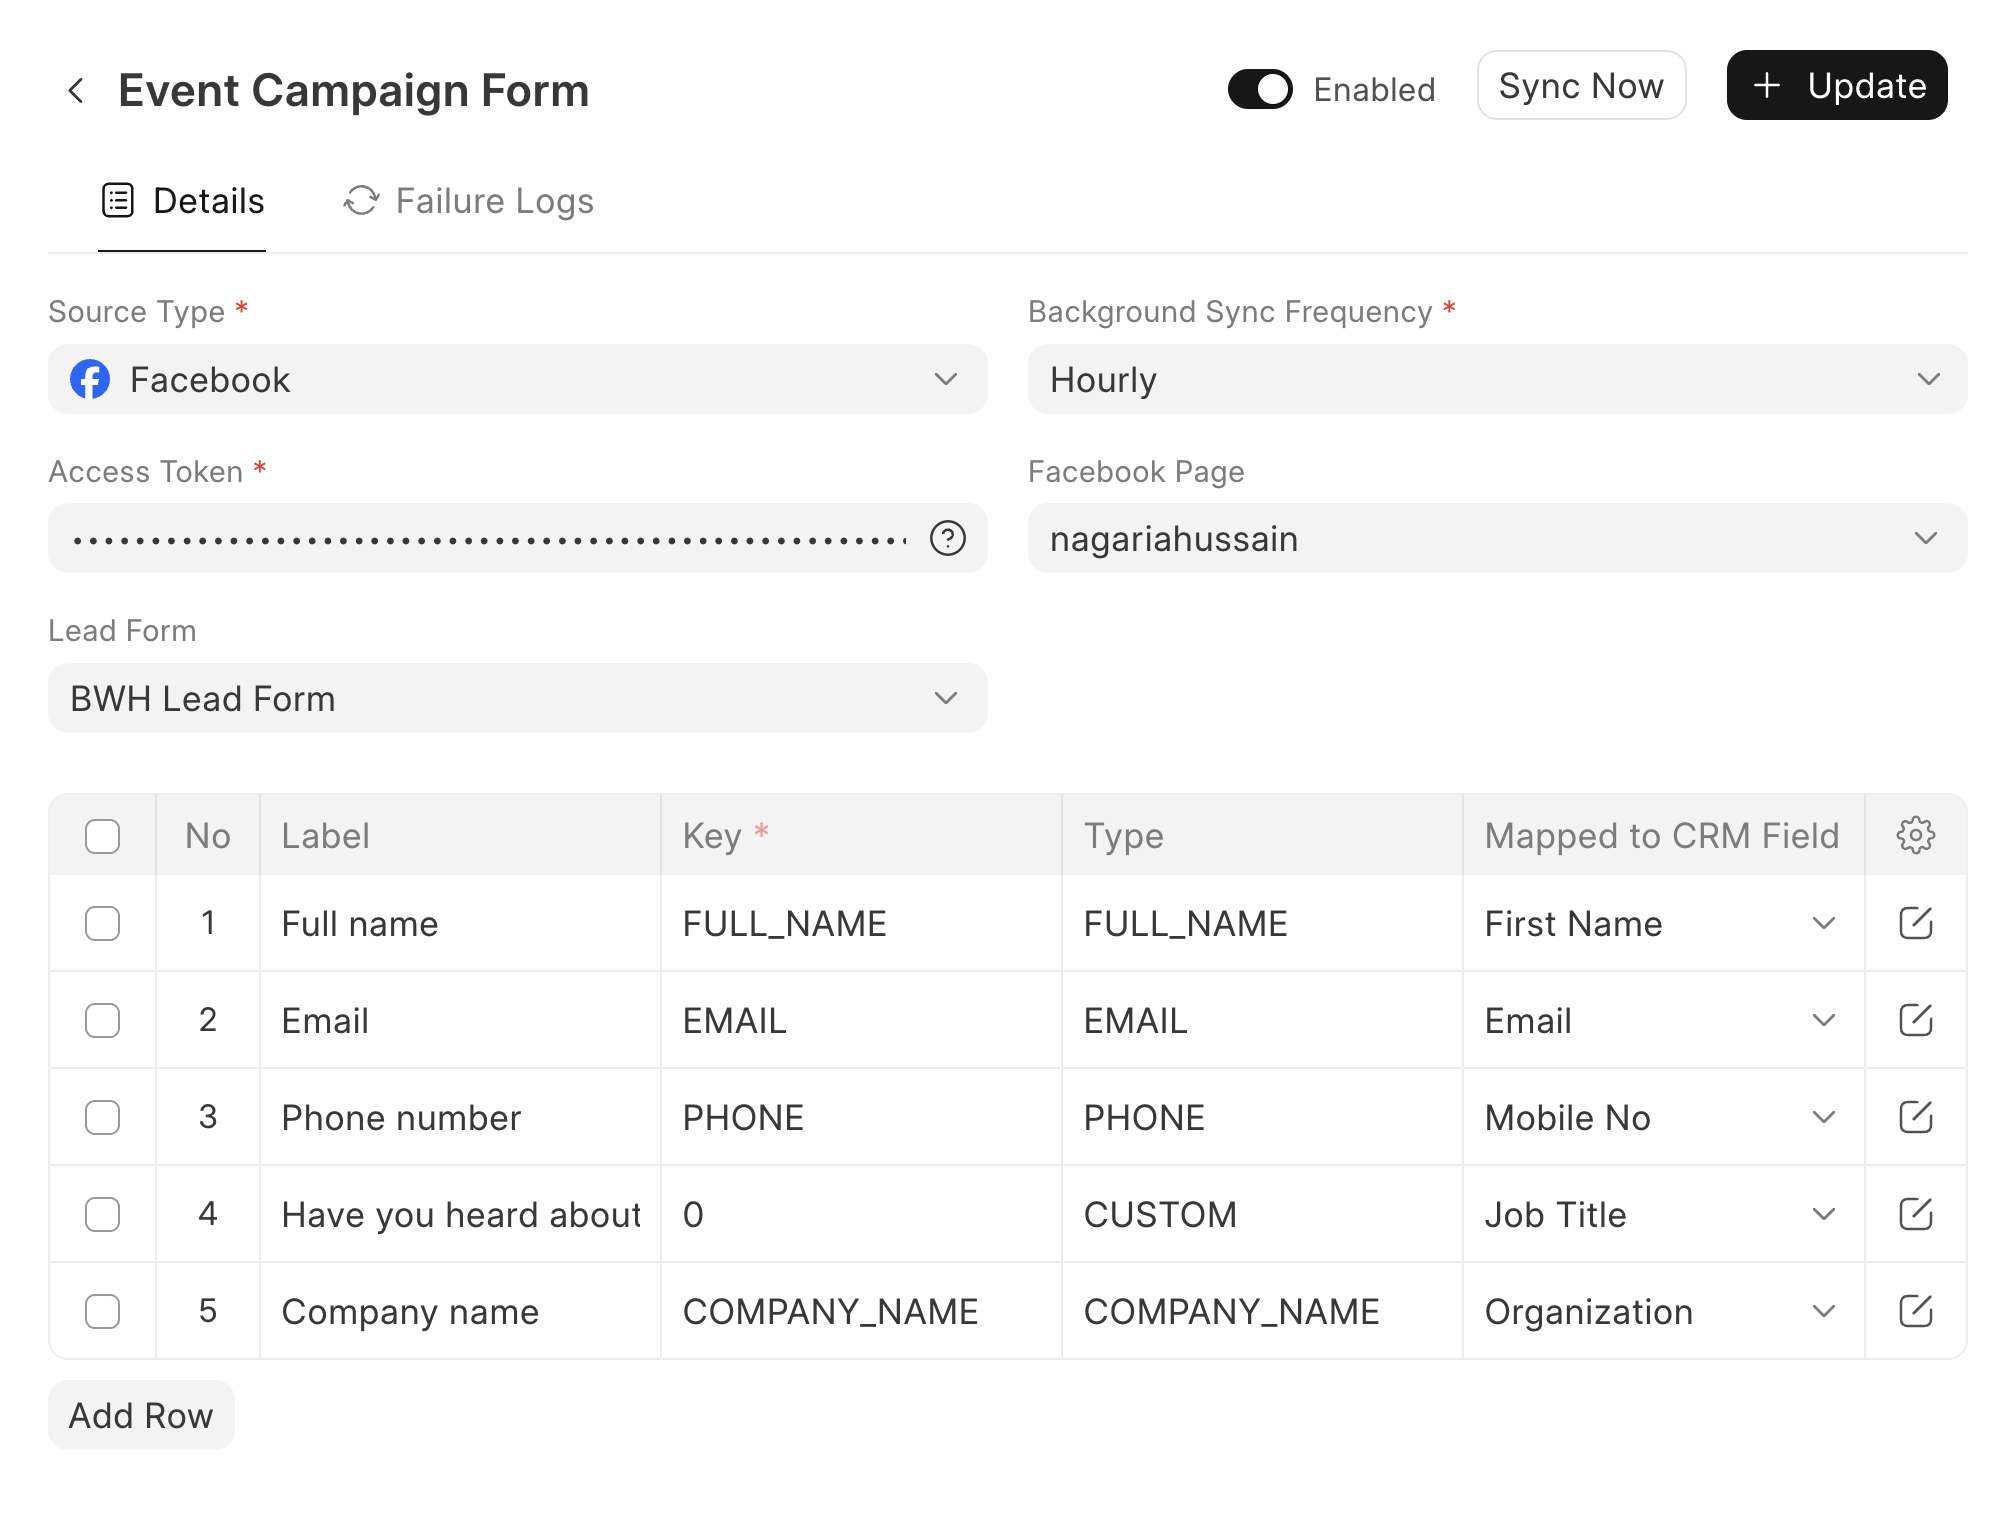
This table let's you easily map fields of your Facebook form to fields in Pixelwand CRM. Apart from this, we also store the Lead ID and Form ID in CRM Lead document. Once you are done configuring the field mapping, click on Update, and that is it! Your leads will start syncing in the background in some time.
Sync Now
You can also manually trigger a lead sync by clicking on the Sync Now button.
Failure Logs & Retry
If your leads don't appear in your CRM, go to the Failure Logs tab, and check the logs. The failure log contains the reason for failure (e.g. Duplicate), the lead data we received from Facebook, and also error traceback if available:
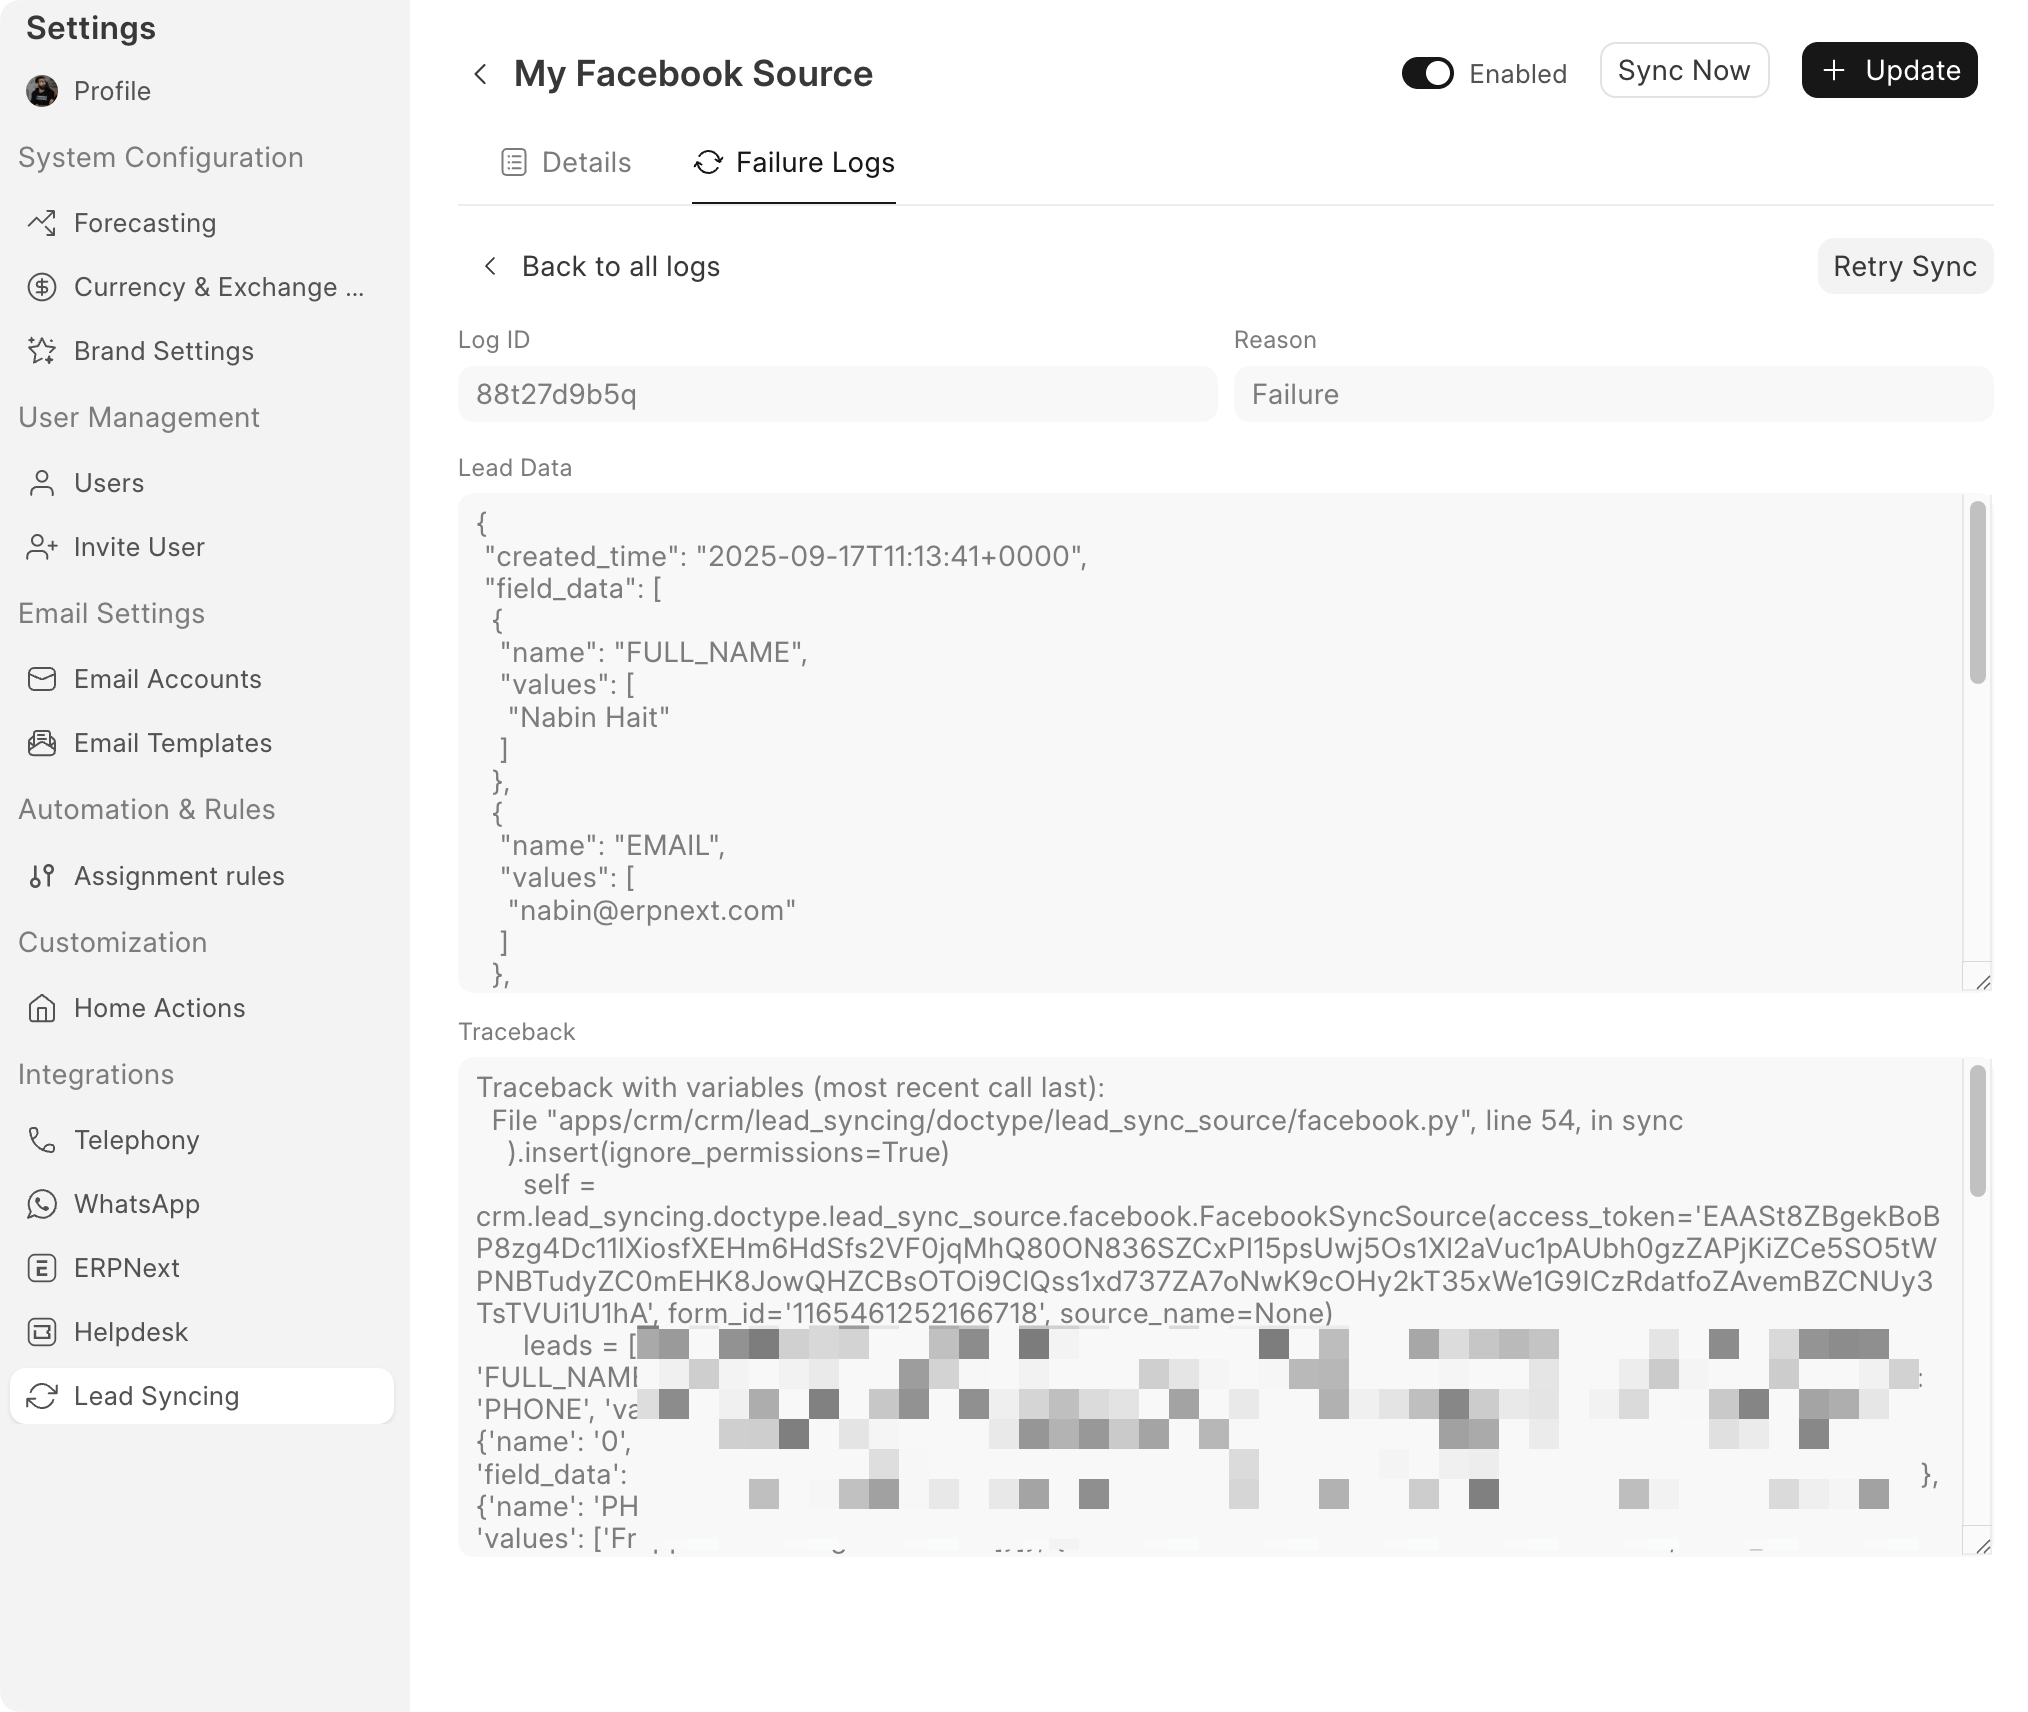
You can click on the Retry Sync button to retry syncing of this particular lead.
Note: A new failure log will get created if a resync fails too.