Setting Up
This guide will walk you through setting up Pixelwand CRM. You'll learn how to configure essential elements, invite your team, and get started managing your sales pipeline.
This guide will walk you through setting up Pixelwand CRM. You'll learn how to configure the essentials, bring in your data, and get your team into the app where daily sales work happens.
Navigating your workspace
After you log in, you land on Overview, your home in the CRM app. This is where your team starts each day with a clear view of what needs attention. The left sidebar is how you get everywhere else. Watch the walkthrough, or read the summary below.
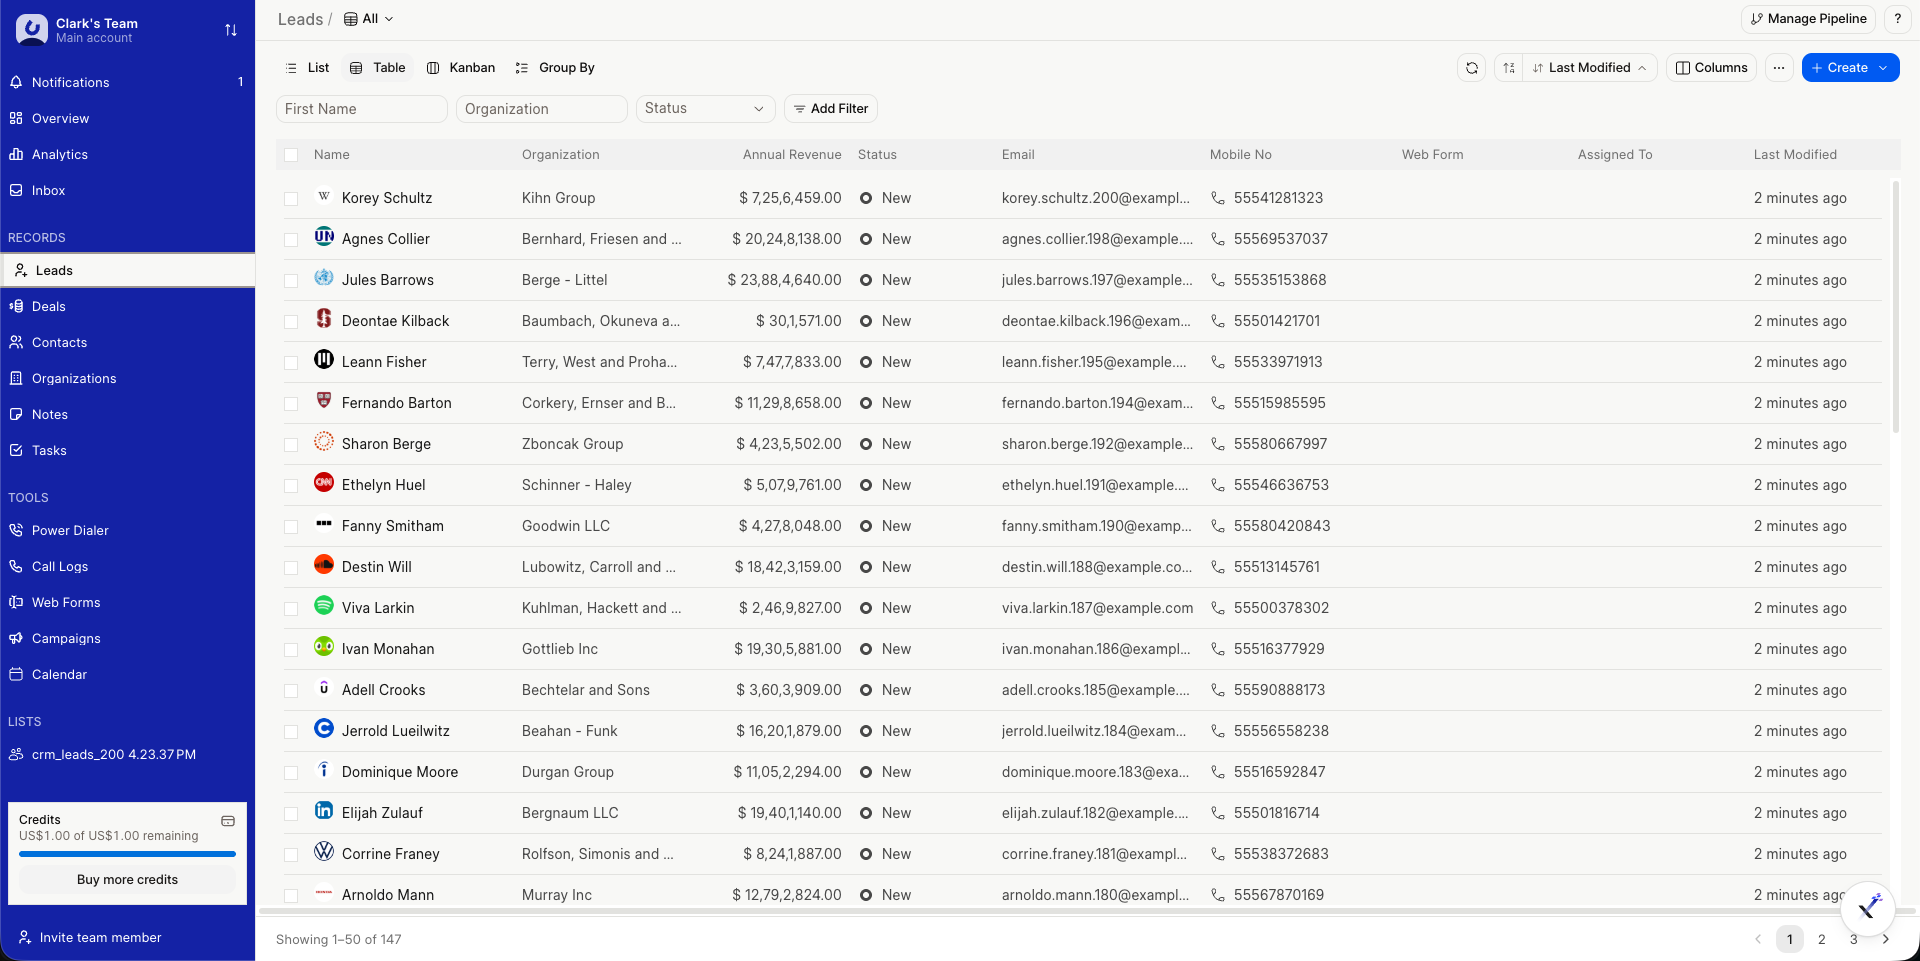
The sidebar is organized from top to bottom like this:
- Account switcher (top left): Shows the account you are working in. Open it to switch between recent accounts, other accounts and sub-accounts. Everything on screen changes to the account you pick.
- Home and Settings tabs, and New: Home is your daily navigation. Settings replaces the sidebar with your configuration options. The New button creates a lead, deal, task or note, scans a business card, or imports leads, from anywhere in the app.
- Notifications, Overview, Reports and Inbox: Notifications shows an unread badge and opens a panel with updates and the tasks that need your attention. Overview is your dashboard, Reports holds the detailed numbers, and Inbox collects your conversations so you can see what needs a reply.
- Records: Leads, Deals, Contacts, Organizations, Notes and Tasks.
- Tools: Power Dialer, Call Logs, Web Forms, Campaigns and Calendar.
- Pinned views: Lists you pin with Pin List appear in the sidebar so they are one click away.
- Footer: Your credits balance, and Invite team member for admins.
For anything beyond day-to-day work (email, messaging, integrations), open the Settings tab. Highlights include WhatsApp Business, Slack, Apollo, Telephony with 10DLC and Google Calendar, along with the standard workspace controls like Members, Permissions, Billing, API Keys, Currency, Statuses and Notifications. The options you see depend on your role, so an option that is missing is usually reserved for admins.
Press ? anywhere in the app to see every keyboard shortcut. For example, b collapses the sidebar, and g followed by a letter jumps to a page, such as g then l for Leads.
Data population
Watch the walkthrough, or read the summary below.
There are four ways to get records into your CRM:
- Create by hand: Click New and choose New lead, New deal, New task or New note, from anywhere in the app. A new lead needs a first name, an organization and a status. Everything else is optional.
- Scan a business card: Click New, then Scan business card. Add a photo of the front (the back is optional) and Pixelwand prefills a new lead for you to check and create.
- Import from a spreadsheet: Download the CSV template from Leads, Deals or Contacts and fill it in, then choose a CSV or Excel file (
.csv,.xlsxor.xls) to import. Choose whether to create a new list for the batch or add the records to an existing list, check the column mapping, and start the import. It runs in the background, and a progress panel at the bottom right shows how it is going. Your plan may limit the number of rows per file. The framework Data Import remains available in Desk if you prefer that route. - Web forms: Collect leads straight from your website. Create and publish a form, share its link, and submissions arrive as new leads.
Adding users
Watch the walkthrough, or read the summary below.
Only owners and admins can invite people. To start, click Invite team member at the bottom of the sidebar, or go to Settings → Members and click Invite members.
In the invitation form, set:
- Invite to: The main account, or one of your sub-accounts.
- Email Address: Where the invitation is sent.
- Role: Admin, Manager, Sales User or User.
- Personal Message (optional): A note to include with the invitation.
Click Send Invitation. If your plan has a seat limit and you have reached it, upgrade your plan to invite more members.
Roles
| Role | What they can do |
|---|---|
| Owner | Full access, including billing and user management. |
| Admin | Manages members, settings and all CRM data. Cannot manage billing. |
| Manager | Works with the team's records. Cannot manage users or settings. |
| Sales User | A standard rep who creates and works their own records. |
| User | Read-only access. |
Owners and admins see every lead and deal in the account. Everyone else sees the records they own, created or are assigned to (and, if Sales Hierarchy is turned on, the records of the people who report to them). For the full list of what each role can do, open Settings → Permissions.
Joining the team
Your teammate receives an email with a link. The page shows who invited them and the role they will have, and their email address is locked to the invitation. They sign up or log in, click Accept invitation, then Go to workspace.
Managing your team
Settings → Members lists your active members and any pending invitations.
- Change a role: Pick a new role in the member's row.
- Pending invitations: Resend the email, Copy link to send it yourself, or Revoke the invitation.
- Remove a member: Pixelwand shows how many leads, deals, tasks and notes are assigned to them, so you can transfer them to another teammate before removing. A phone number assigned to them goes back to your available numbers.
Working a lead
Once your leads are in and your team is on board, the daily routine is simple: log the call, write the note, set the next step. Watch the walkthrough, or read the summary below.
Click any lead to open it. The top bar lets you assign the lead to a teammate, add tags and set its status, and it has a Convert to Deal button for when the lead is ready to buy. Below it, the Activity timeline shows everything that happens with the lead, in order: calls, notes, tasks and emails. Use the tabs to see one kind of activity at a time, such as Notes, Tasks, Comments or Attachments. The lead's details are on the side.
- Log a call: Click Log call, choose whether the call was incoming or outgoing, set the outcome (for example Completed or No Answer) and the duration, and save. The call appears in the timeline right away, so your whole team can see it happened.
- Add a note: Click New Note, give it a title and write what you learned, such as what they care about, who else is involved and what they said about timing. You can pick a colour to make the note easy to spot. Notes stay attached to the lead for anyone who opens it later.
- Set a follow-up task: Click New Task, give it a clear title, choose who it is for, and set a due date and priority. The task shows in the lead's Tasks tab. Leave every lead with a next step, so none of them goes cold.
- Move it forward: Update the lead's status from the status dropdown as the conversation progresses, and click Convert to Deal when the lead is ready to buy.
To see what needs doing today, open Tasks in the sidebar or check Notifications.
Accessing your CRM portal
The CRM Portal Page entry in the Desk workspace opens the CRM app, the same place you see Overview and your lists, so the experience stays seamless. This is where your team works on leads and deals every day.
Start your sales journey
With these pieces in place, you can manage leads, track deals and collaborate with your team, all in the CRM app, with Desk available for deeper administration when needed.